Registration
How to Run Youth Sports Tryouts and Send Offers
Set up youth sports tryouts in Team Assist: take free sign-ups, check players in, record decisions and send team offers that families can accept online.
This guide is for club directors and registrars who run tryouts before a season. By the end you will have a tryout program open for sign-ups, a record of who came, your decision on each player and offers on their way to families. The screenshots use a fictional club.
Team Assist keeps the records and sends the messages. Your organization decides who makes each team and sets its own fees and policies.
Set up the program
1. Create the program and turn on tryouts
Open Programs and select New program. Enter a Program name, choose the kind of program and turn on Take registrations online. Then select Continue.
On the Joining step, turn on Hold tryouts and choose Staff offer spots after tryouts. Families sign up for free, and you offer each selected player a spot on a team. If every player who registers will get a team, choose Everyone makes a team instead. This guide follows the offers path. Turn on Sort players into age groups if you hold tryouts by age group.
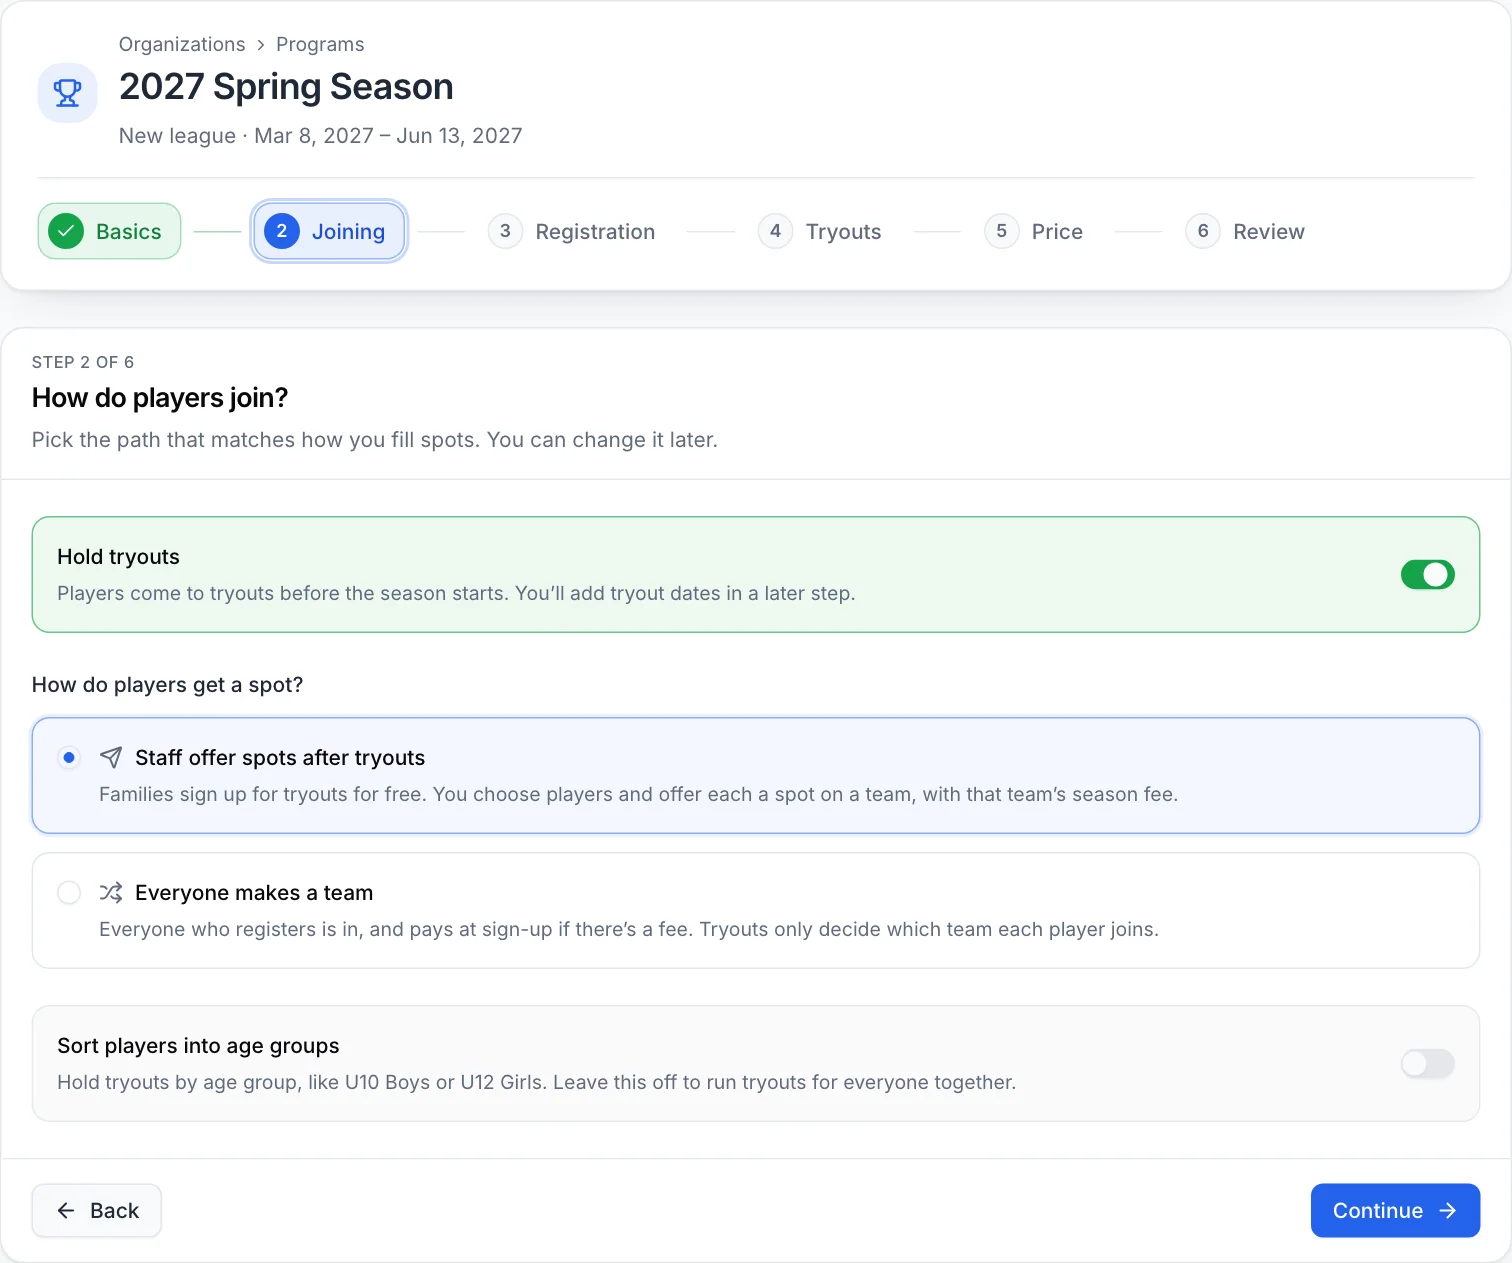
2. Add tryout dates and season fees
On the Registration step, set when registration opens and closes, and add Contact emails for families. On the Tryouts step, select Add a tryout date and enter the date, times and location. If you don't know the dates yet, skip this step and add them later.
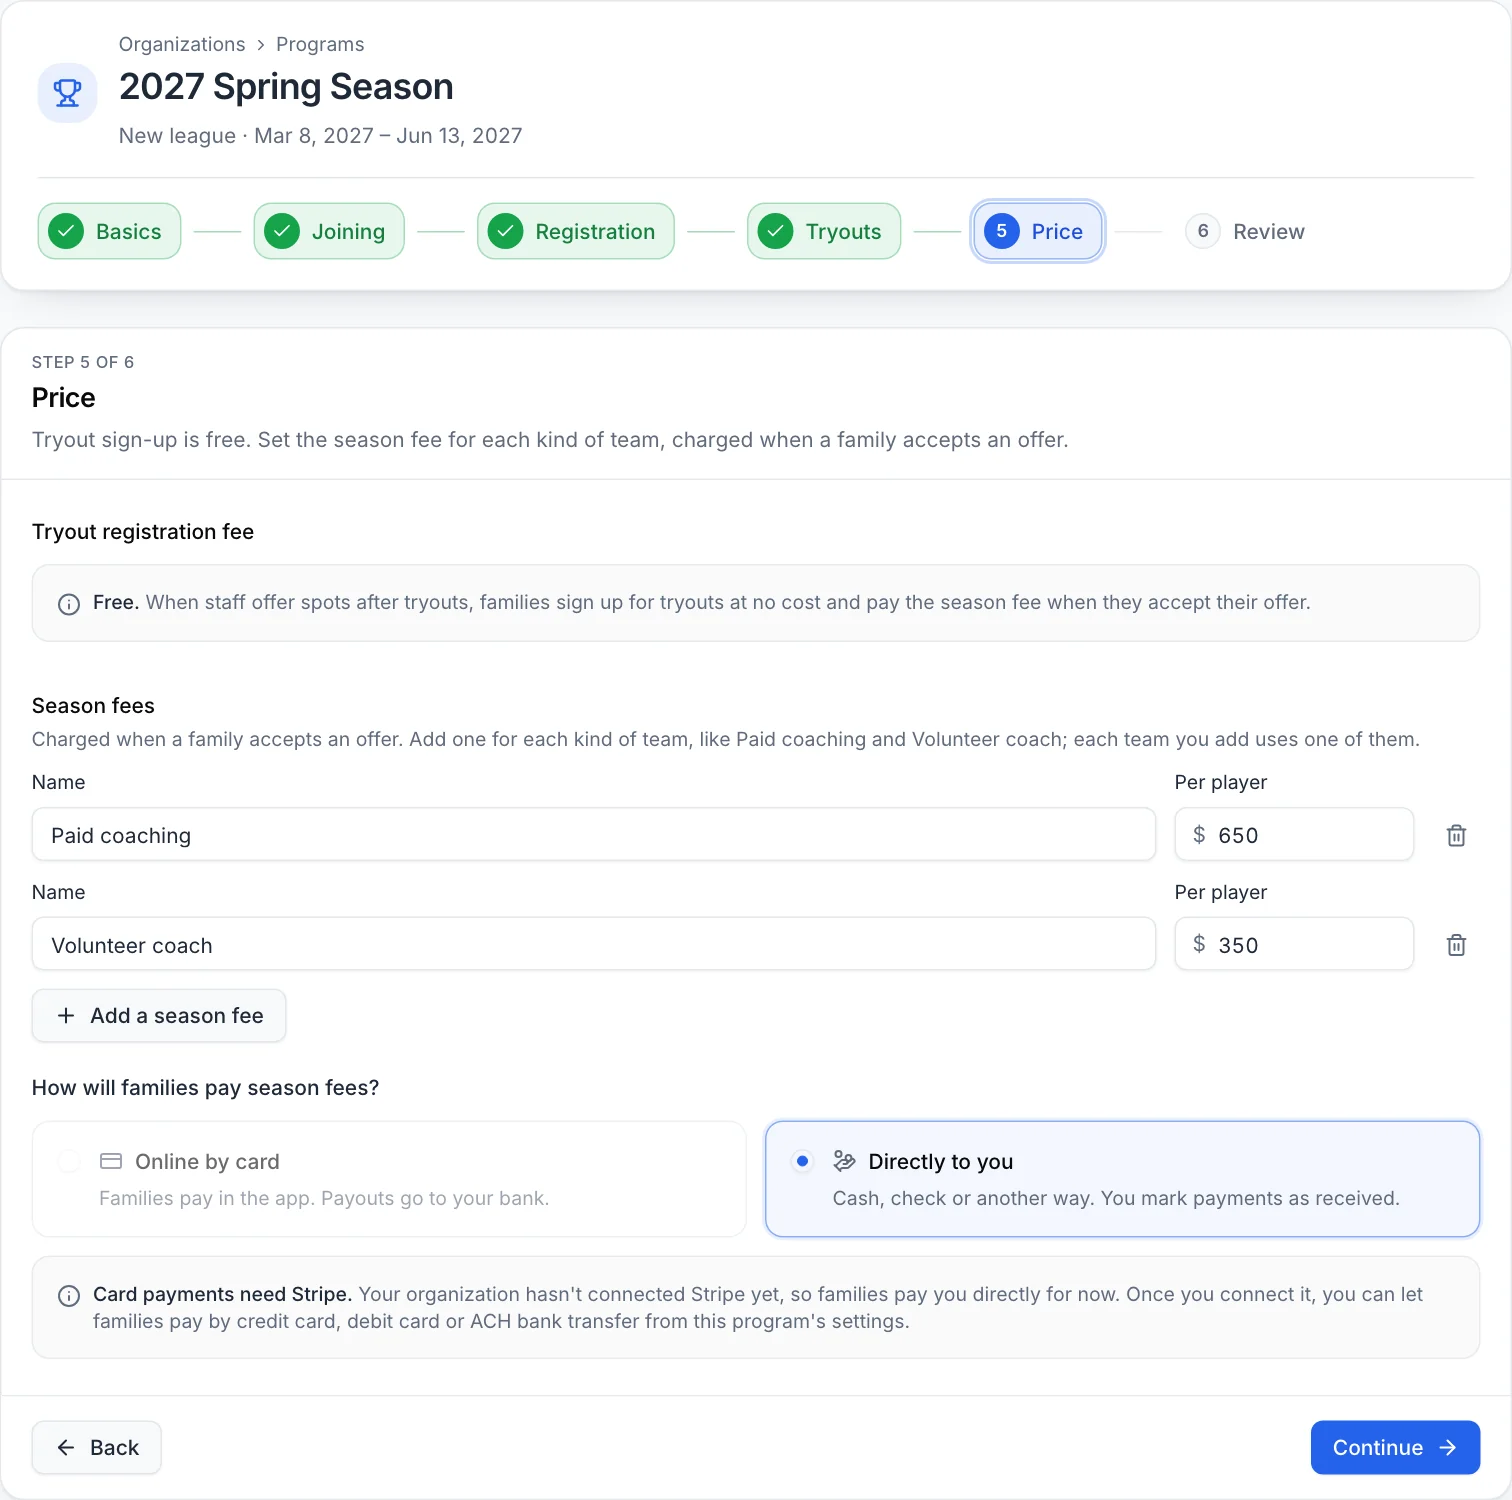
On the Price step, add a line under Season fees for each kind of team, such as Paid coaching and Volunteer coach. A family pays this fee when they accept an offer, not when they sign up for tryouts.
Then choose how families pay. Online by card needs a connected Stripe account, which our guide to collecting registration fees online covers. Directly to you means cash, check or another way, and you mark payments as received.
On the Review step, check your answers, choose Open registration now and select Create program. If you still want to add waivers or custom questions, choose Keep registration closed for now and add them in Program settings first.
3. Add teams and share the registration page
On the program's Overview, select Add teams. You can create teams for each age group or upload a spreadsheet, and each team uses one of your season fees.
The Registration page button on the same screen opens the public page. Send that link to families. The page tells them they are registering for tryouts and that team placement happens afterward, so nobody mistakes a sign-up for a place on a team. You can read more about Team Assist's sports registration tools.
Run the tryouts
4. Follow sign-ups on the dashboard
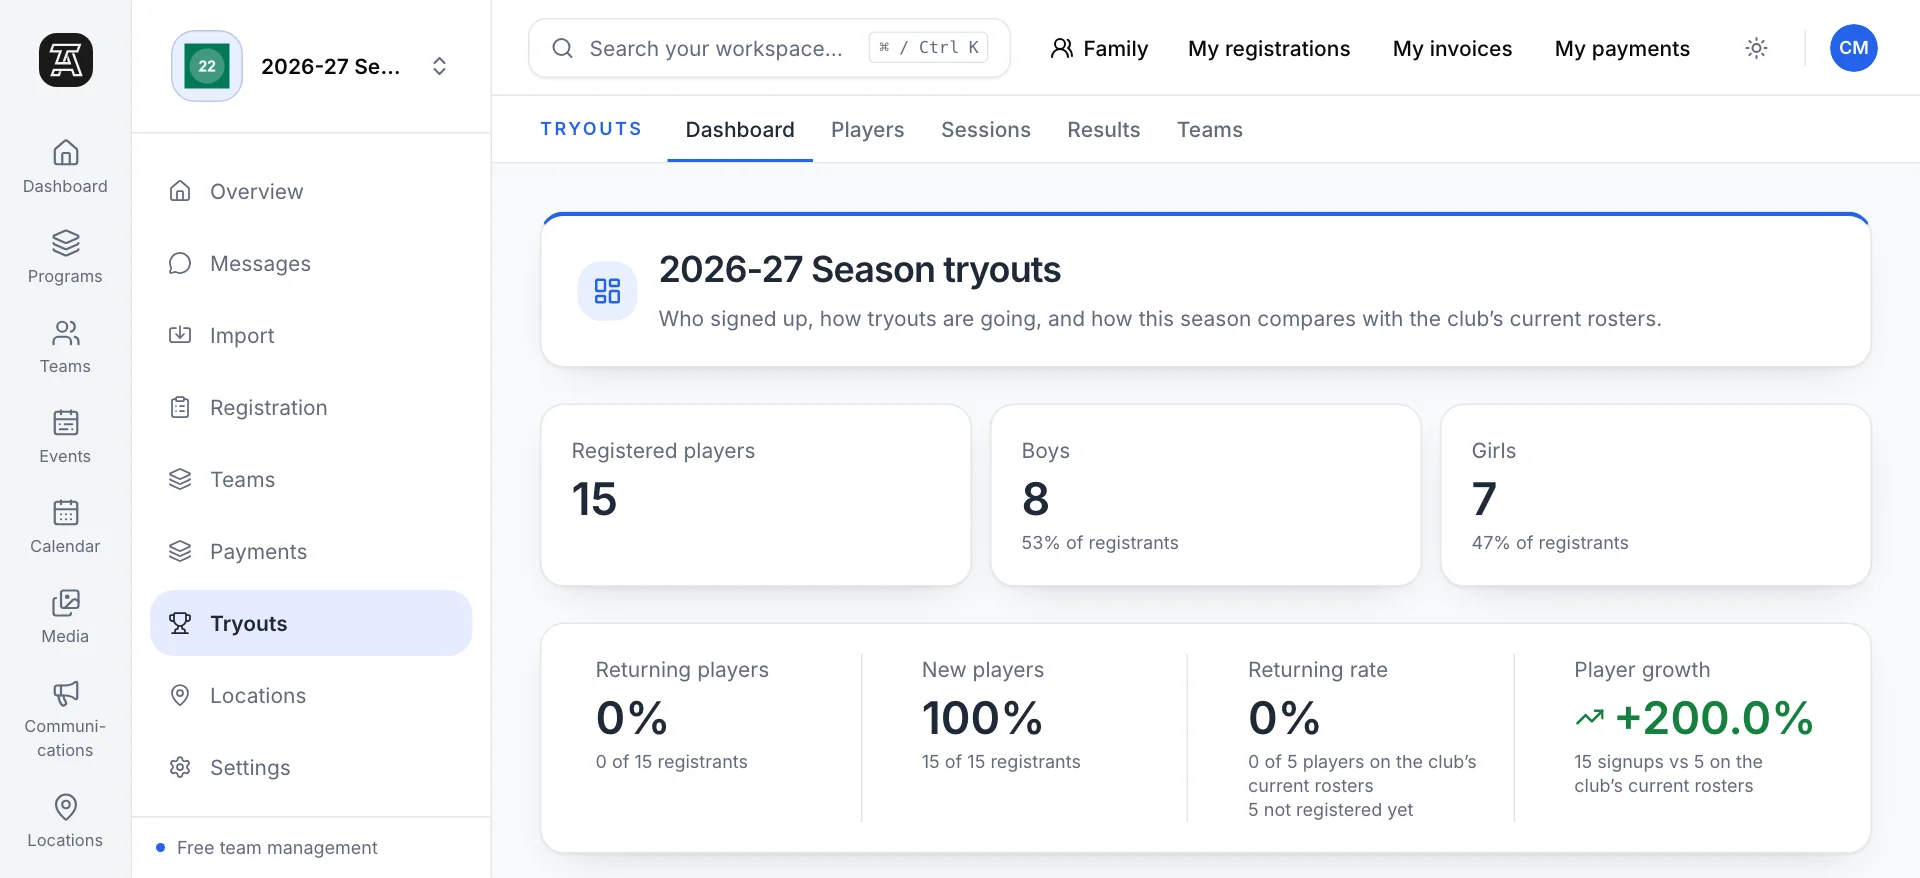
Select Tryouts in the side menu. The Dashboard shows how many players registered, how many are returning or new compared with your current rosters, your next tryout dates and the latest families to sign up. Players lists each registration when you need the details.
5. Run each tryout date
Open Sessions. Use Schedule a tryout session to add more dates and Edit or cancel session to change one. Families can answer Yes, No or Maybe for each date until it starts, and Answers and attendance shows the counts so you can plan groups and equipment. Answers are optional, so treat them as a guide.
Before you leave for the field, open the Check-in sheet for that date and print it.
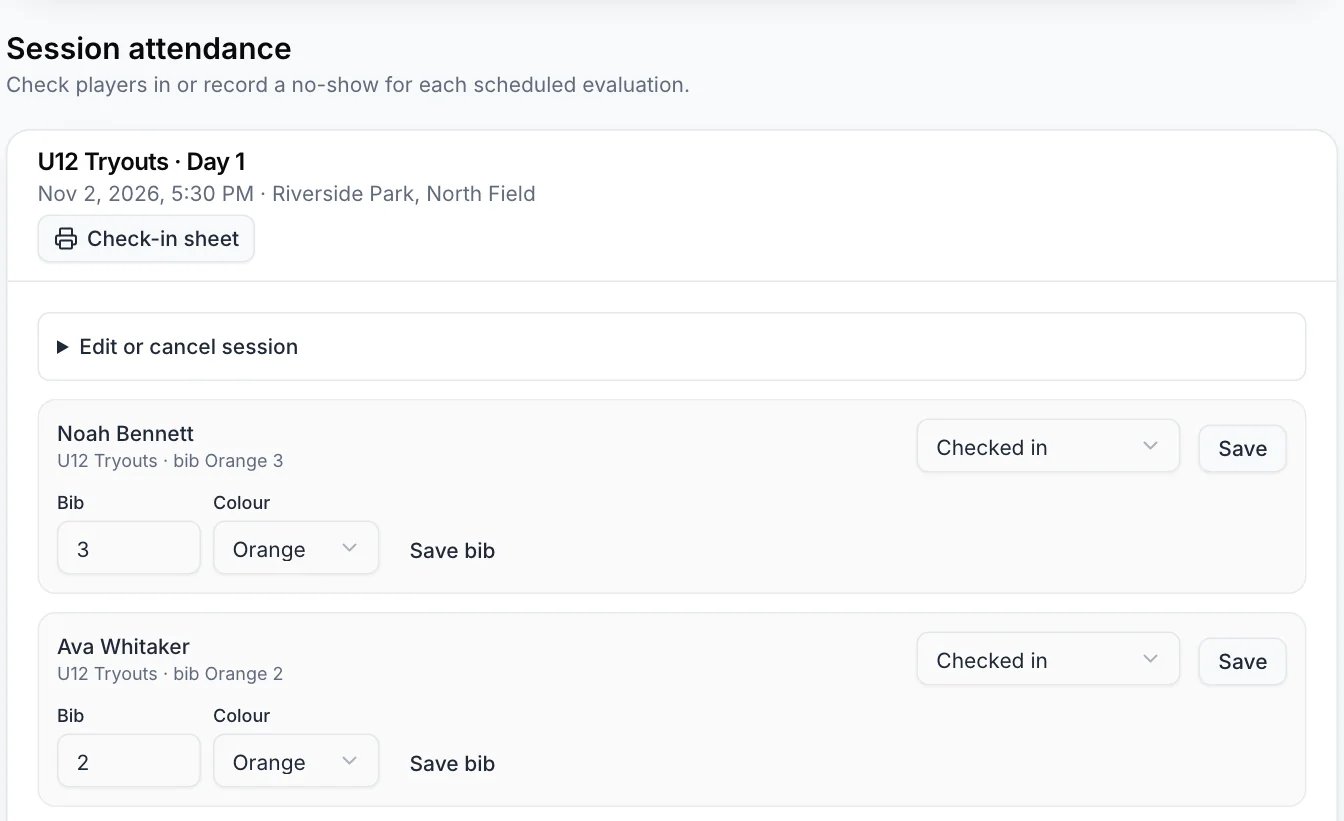
At the field, set each player's status under Session attendance to Checked in, No show or Excused, then select Save. Give each player a Bib number and Colour and select Save bib. A player checked in without a Yes or Maybe shows as a walk-up.
Decide and send offers
6. Record your decisions
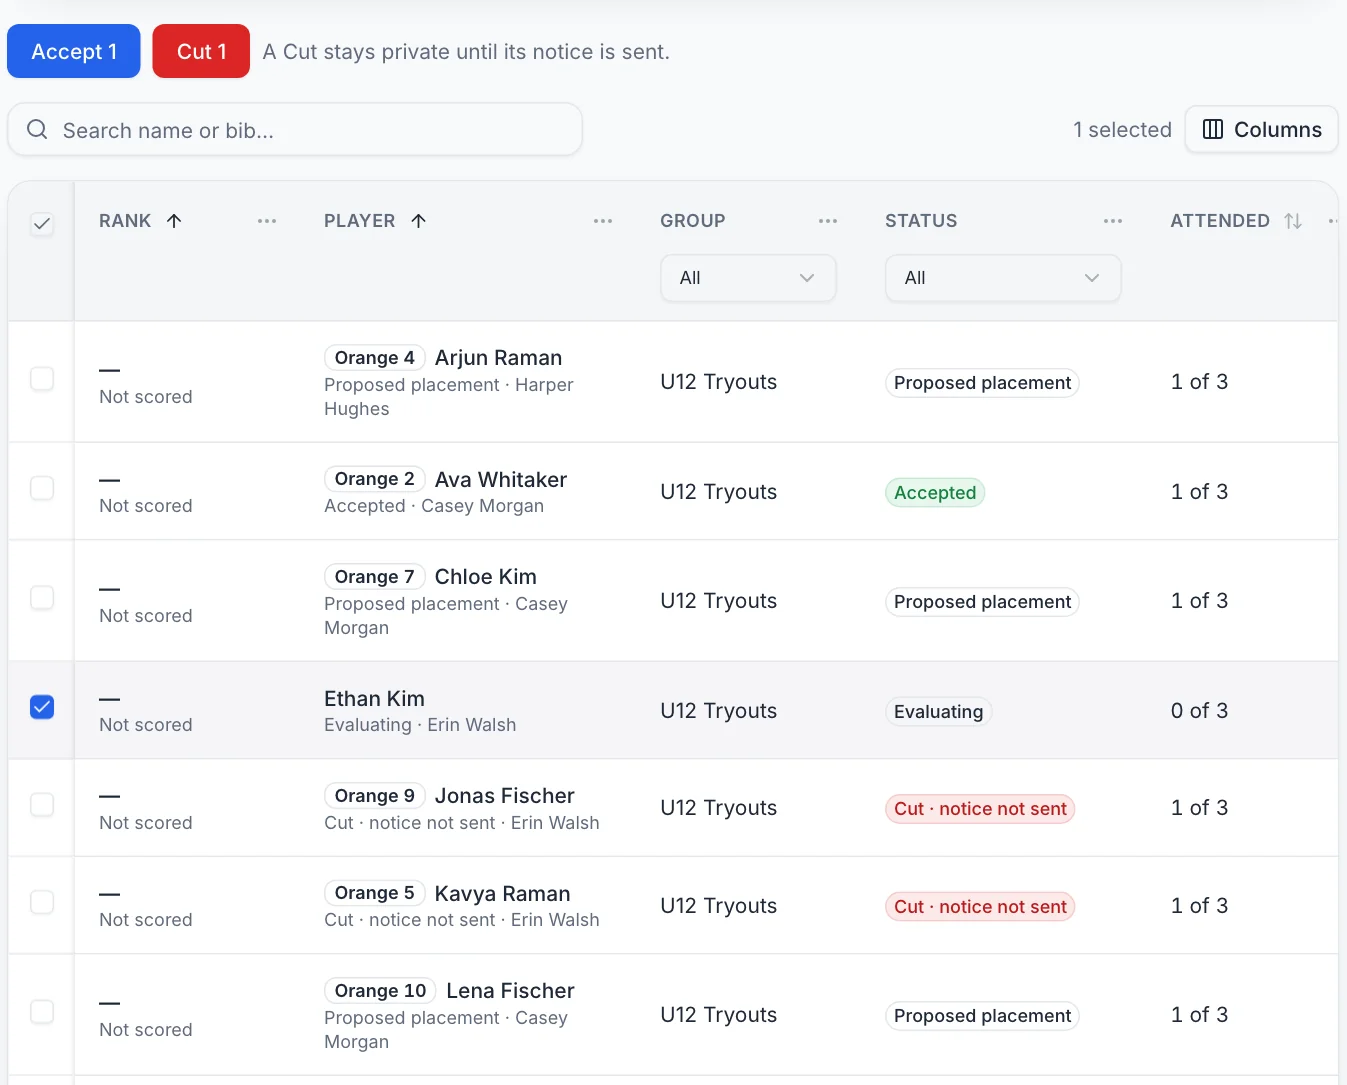
Open Results. Each row shows a player's group, status and attendance. Select the players you have decided on, then select Accept or Cut. A Cut stays private until you send its notice, so you can record decisions as you go and tell families when you are ready.
7. Place players and send offers
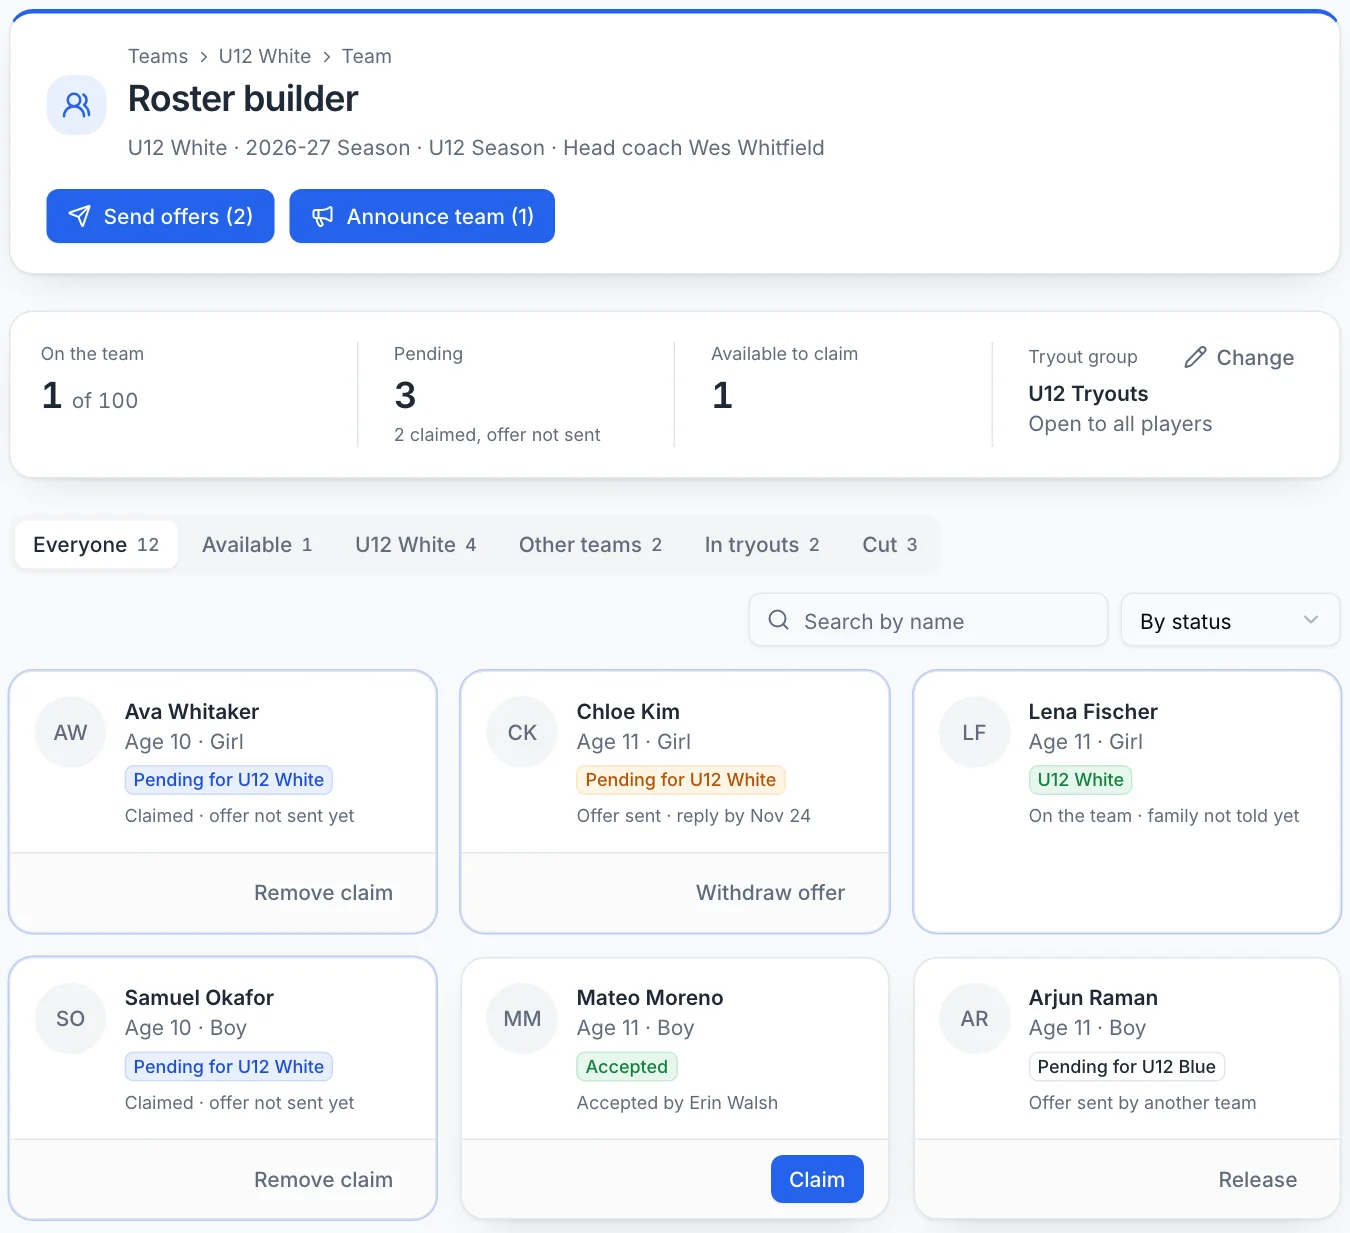
Open Teams and select Roster builder for a team. Select Claim on each accepted player you want on that team. Nothing reaches the family yet, and the player's card says the offer has not been sent.
When the team looks right, select Send offers. The dialog lists each player with the price and reply date. Select Send, and each family gets the offer by email.
If plans change, select Withdraw offer. If a family declines, you can select Offer again. Back on the Teams page, Remind lets you review the recipients before you send a reminder about their offers.
8. Know what families see
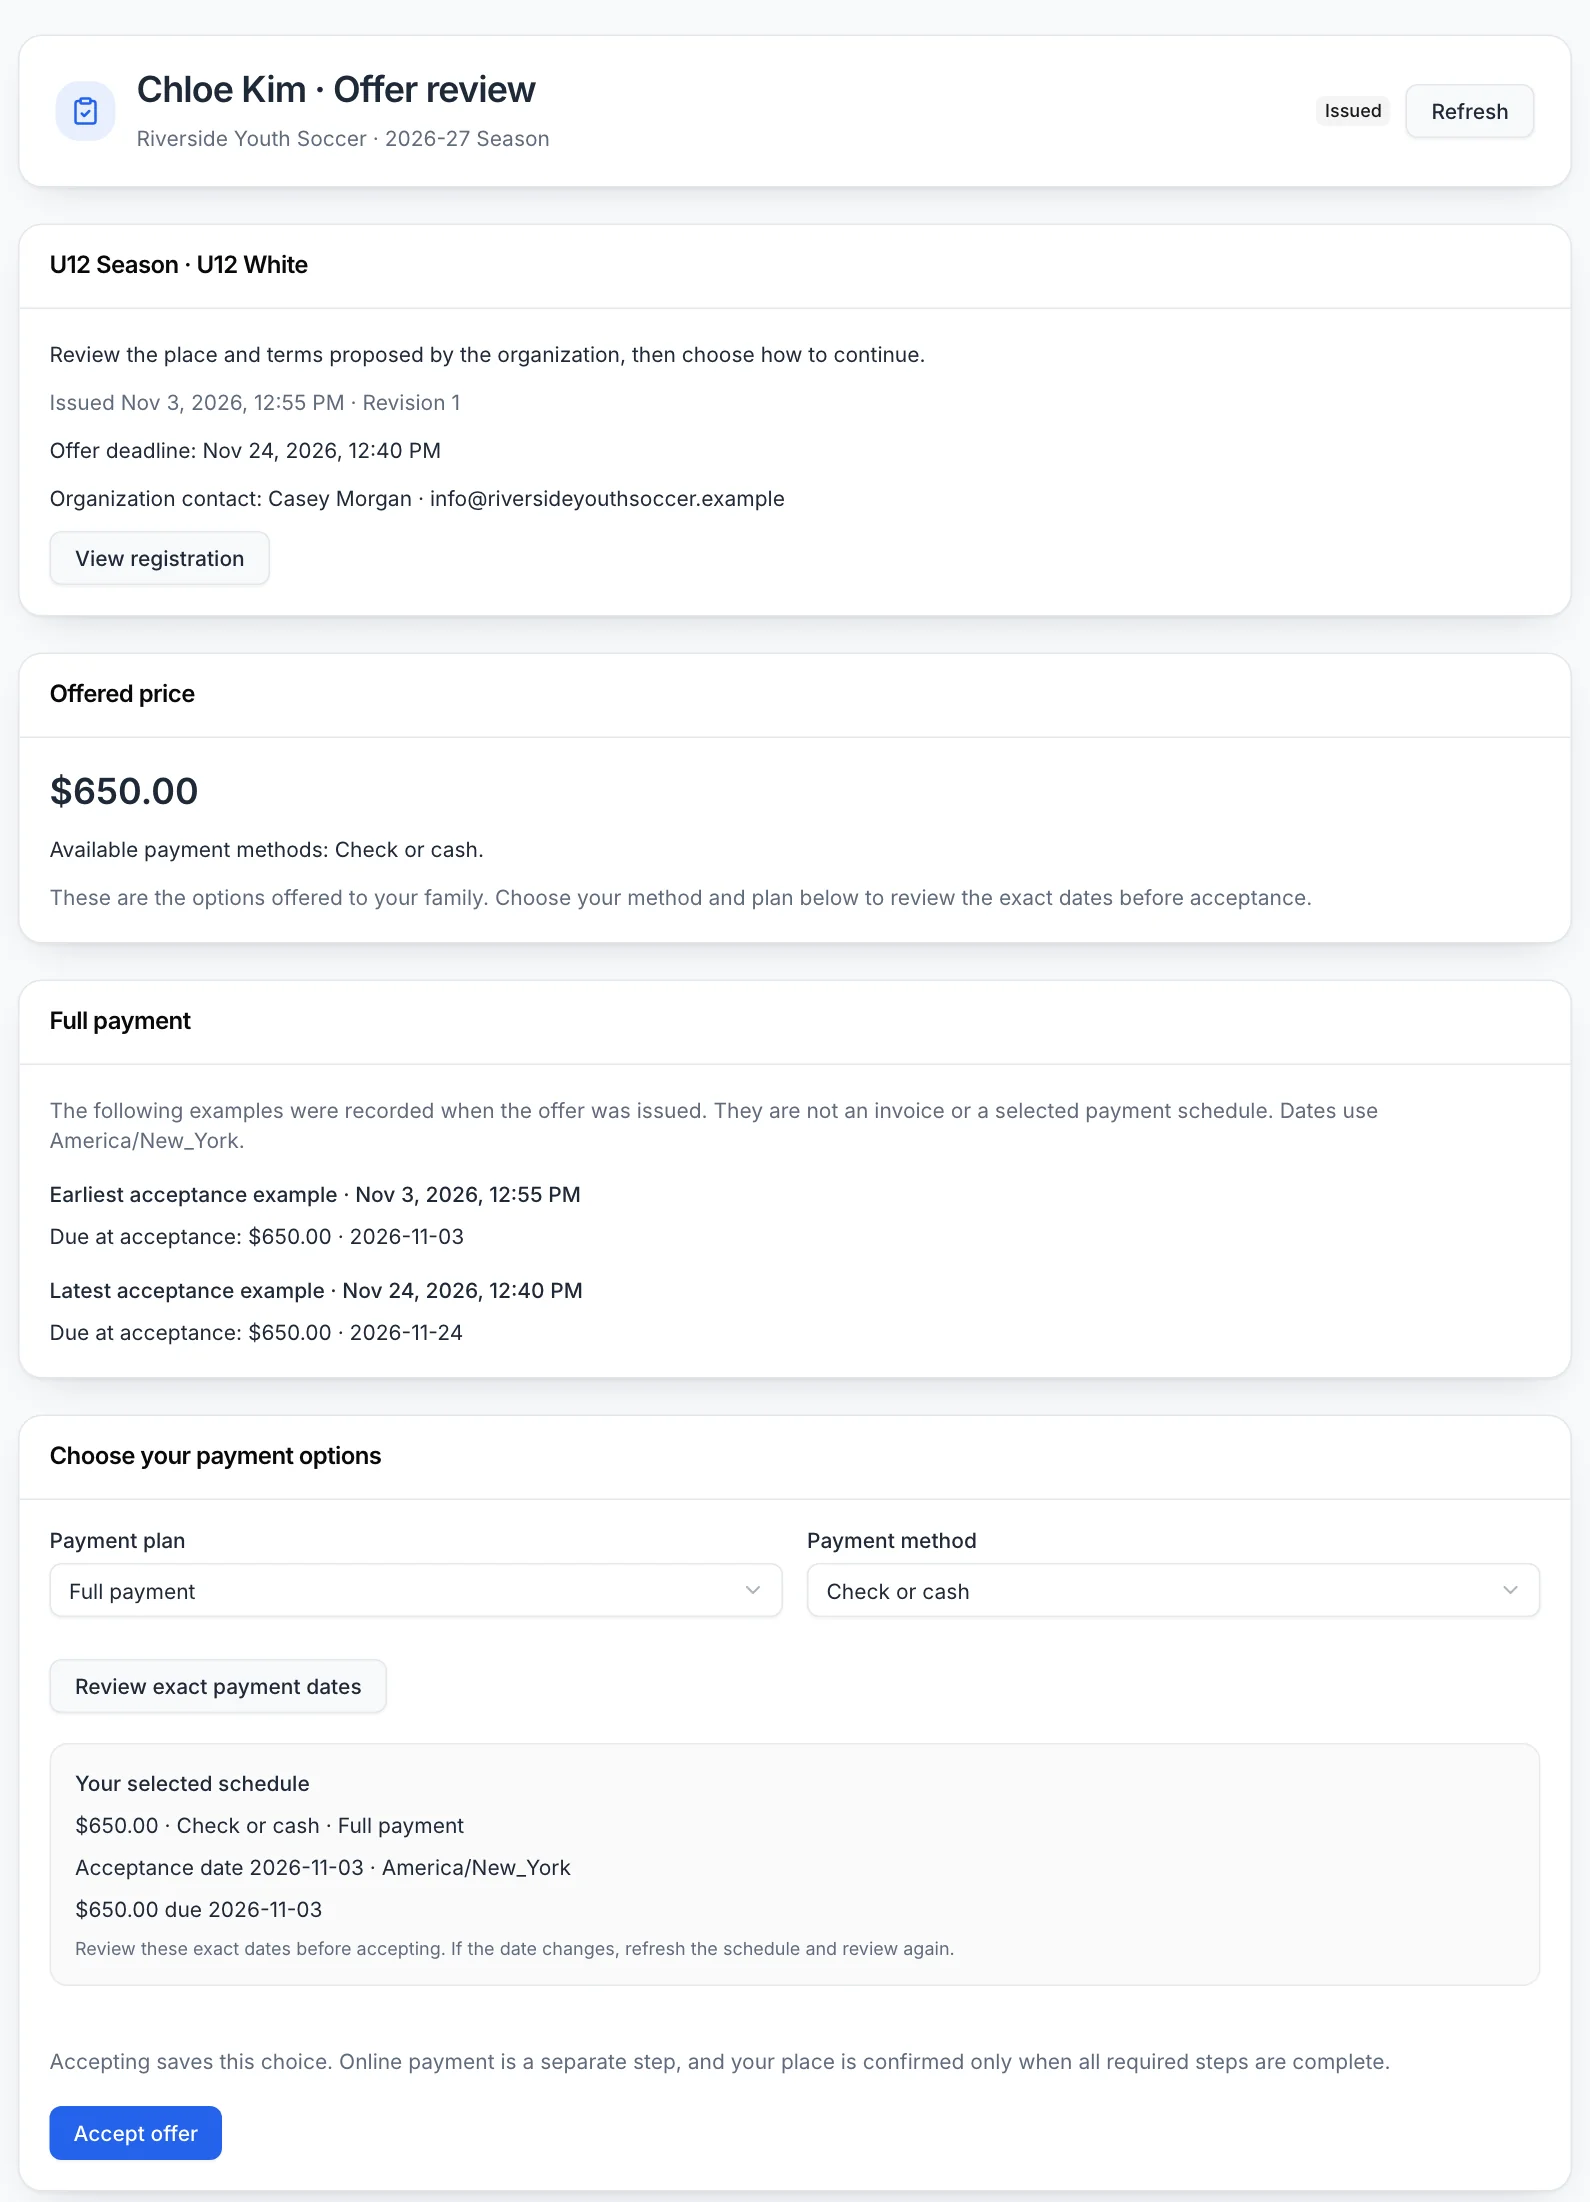
Each family gets the offer by email and can also find it under My registrations. The offer shows the team, price, deadline and your contact details. They choose a Payment plan and Payment method, select Review exact payment dates, then select Accept offer. They can also decline.
If a family pays online, payment is a separate step, and the place is confirmed only when all required steps are complete.
An accepted player moves onto the team, with a note that the family has not been told yet. Select Announce team to send those families the team name and head coach. Nobody is told twice.
9. Send cut notices
On the Players page, or below any Roster builder, the Cut notices panel lists players whose notice has not gone out. Select the players, use Write personal message if you want to add a note, and select Send notices. Each family gets one email per child naming the group. Staff notes are never included.
Sending is final, because the player can't be moved back into that group. Check the list before you confirm.
Once rosters are settled, send your welcome message and hand the season over to your managers with the team manager checklist.