Team management
How to Set Up a Youth Sports Team in Team Assist
Create your team, add players, invite families, schedule the first event and send the first update. A step-by-step guide to setting up a youth sports team in Team Assist.
This guide is for a coach or team parent setting up a team for the first time. By the end, you will have a roster, one invitation for all your families, a first event on the schedule and a place for team updates.
Team and organization management in Team Assist is free. Additional storage and streaming are separate, optional purchases.
Gather what you need
- Your players' first and last names. Birthdates, jersey numbers and gender can wait.
- The date, time and location of your next practice or game.
- The email address of any coach or manager who should help you run the team.
Set up your team
1. Create your account
Go to the sign-up page, enter your name and email address, choose a password and accept the terms. Select Create account, then enter the six-digit code we email you to verify your address.
2. Create the team
Team Assist asks what you want to do. Choose Create a team if you are running one team. Choose Set up an organization if you run a club, league or rec program with registration and many teams. If someone sent you a team code, use Join a team instead.
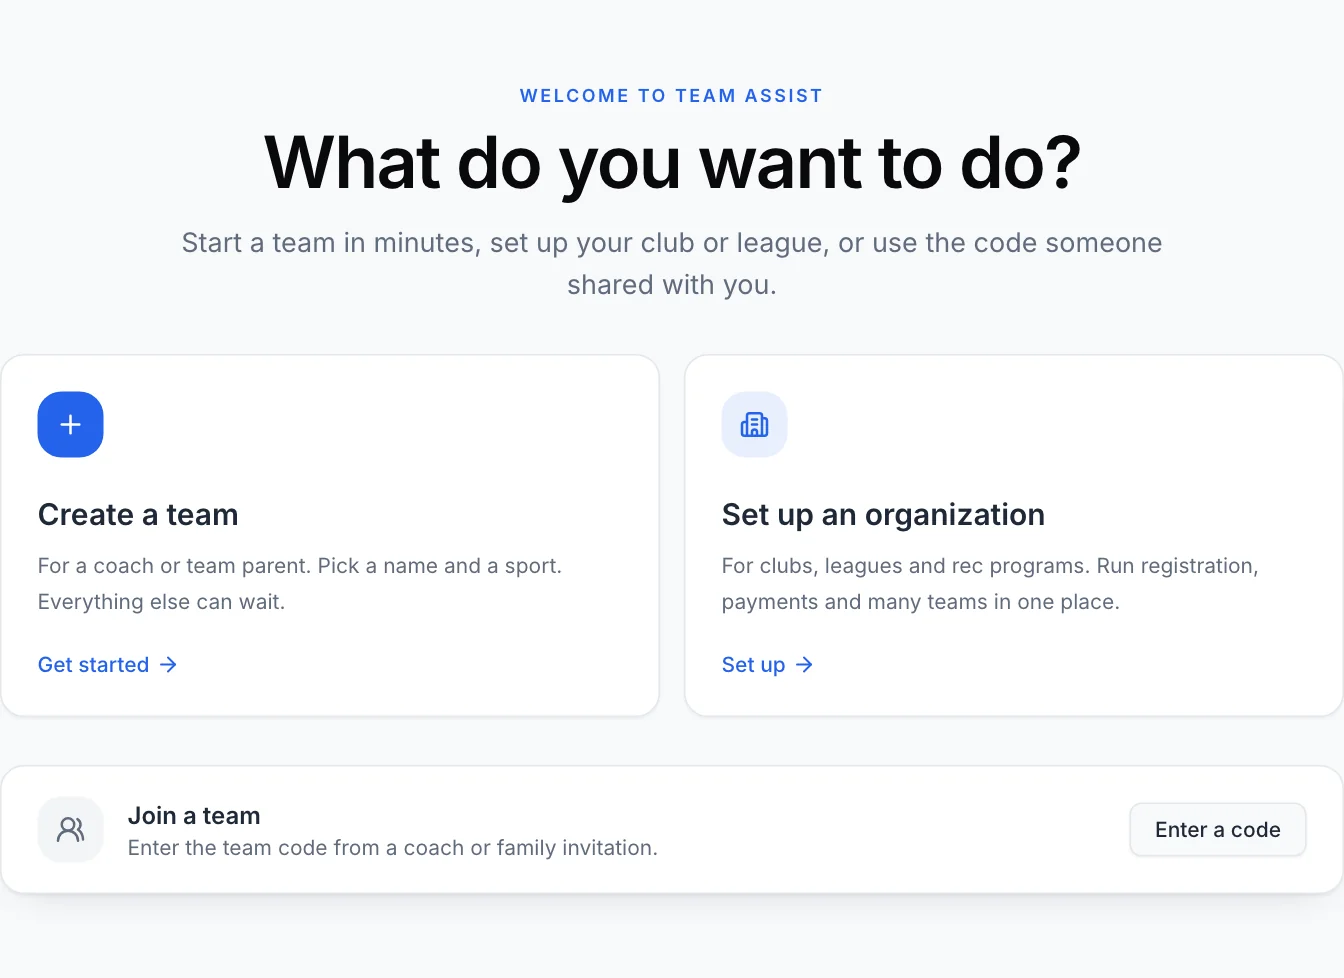
Enter a Team name, choose a Sport and select Create my team. Choose the sport carefully. It sets the stats your team can track, and it cannot be changed once selected.
Your team opens on its Overview page with the invitation window on top. Select Done for now, because your roster comes first. The side menu holds Overview, Team, Schedule, Media, Chat and Settings.
3. Add your players
Open Team in the side menu and select Add player. Only the first and last name are required. Select Add player in the form to save, then repeat for the rest of the roster.
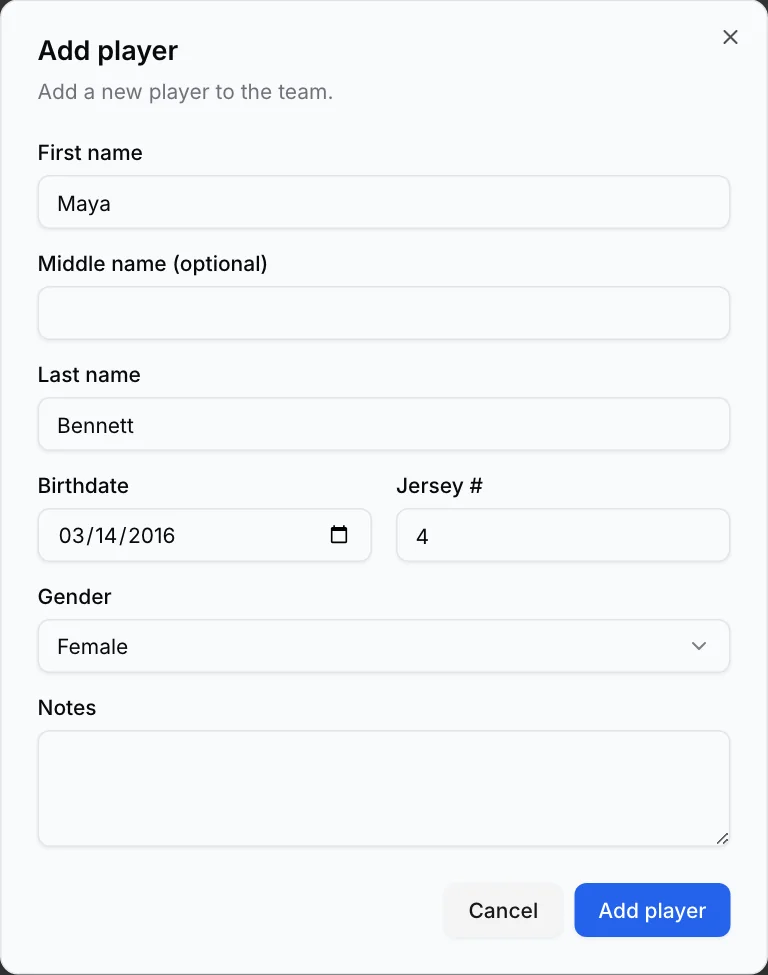
Finish this step before you invite anyone. Parents connect to a player who is already on your roster, so each name needs to be there when they arrive.
4. Invite families
Go back to Overview and select Invite people. The Invite families tab gives you one link for the whole team. Copy it into your own message, or use Email, Text or Show QR to share it. Families can also type the team code on their Get started page.
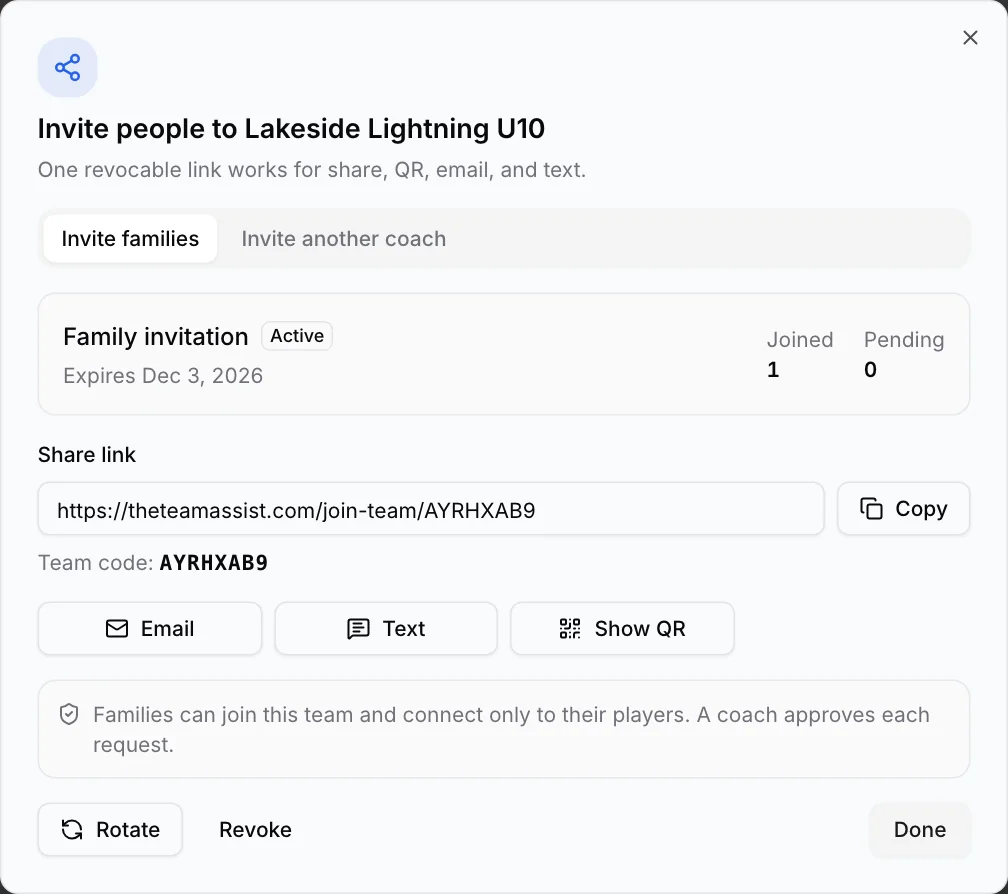
Check the expiration date shown on the invitation. If the link reaches the wrong people, Rotate replaces it and Revoke turns it off. Either way, the current link and code stop working immediately.
Tell families what to expect when you share it. Our welcome message template is a good starting point.
5. Approve each family
A parent who opens the link creates an account or signs in, selects their player and says how they are connected. Parent / Guardian can RSVP, pay and sign forms for the player. Family friend / Fan follows the team's schedule and chat but can't act for the player. Player account is the player's own sign-in.
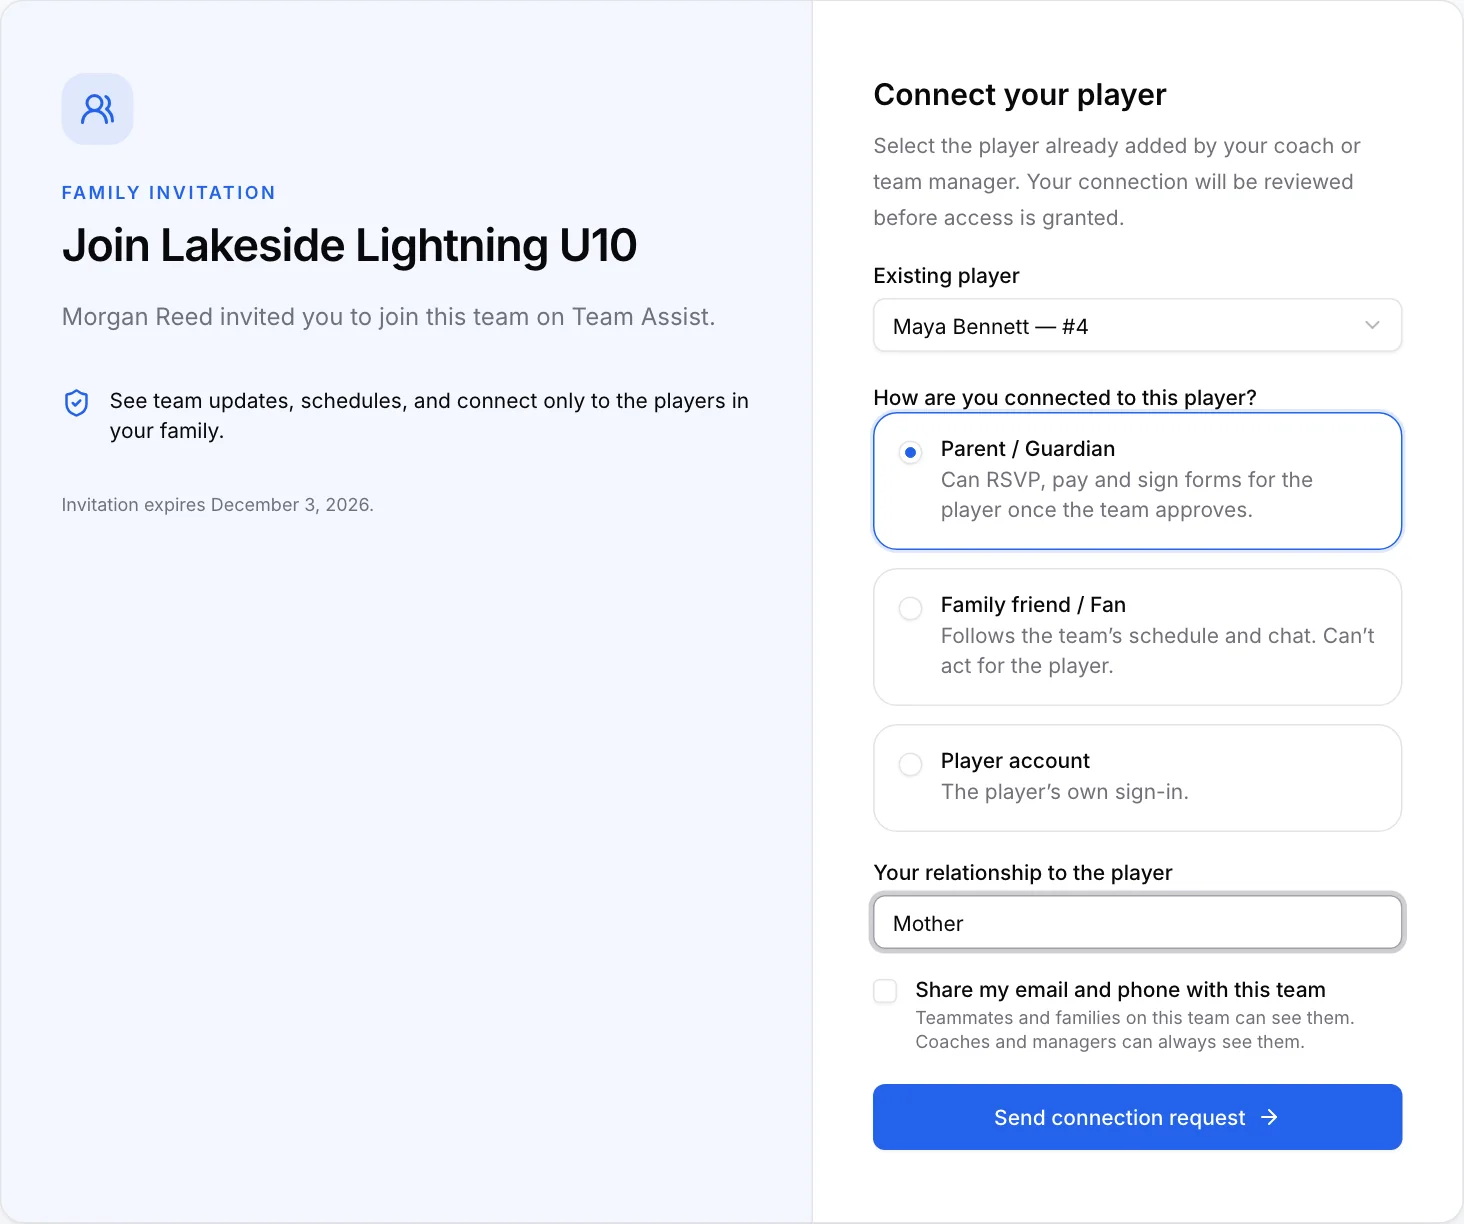
Their request waits for you on the Team page under Connection requests. Check that the person and the player match, then select Approve or Reject. When you approve, you confirm whether they join as a Parent / Guardian or a Family friend / Fan. Team access is granted only after approval.
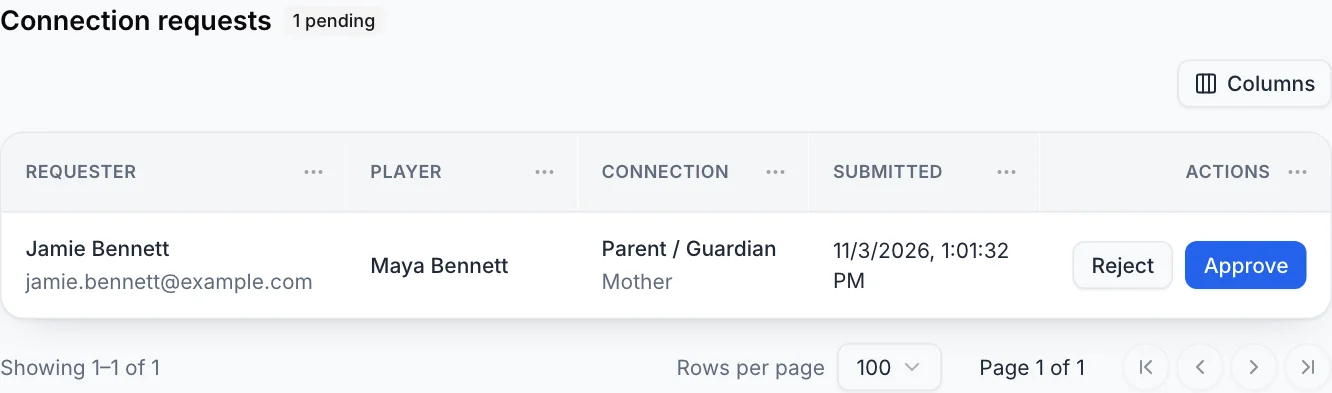
Once approved, the family sees their player and the team's upcoming events on their Family page.
6. Add other coaches
Select Invite people again and open Invite another coach. Choose a Position, such as Assistant coach or Team manager, enter the Coach's email and select Send invite.
This invitation works only for that email address, confirmed with a code we send them. Coaches get team access, not club or billing access.
7. Add the first event
Select Add first event on Overview, or New event on Schedule. Add a Title, a Date and time and a Location. For a game, select Track score, which adds an optional Game type and Opponent team.
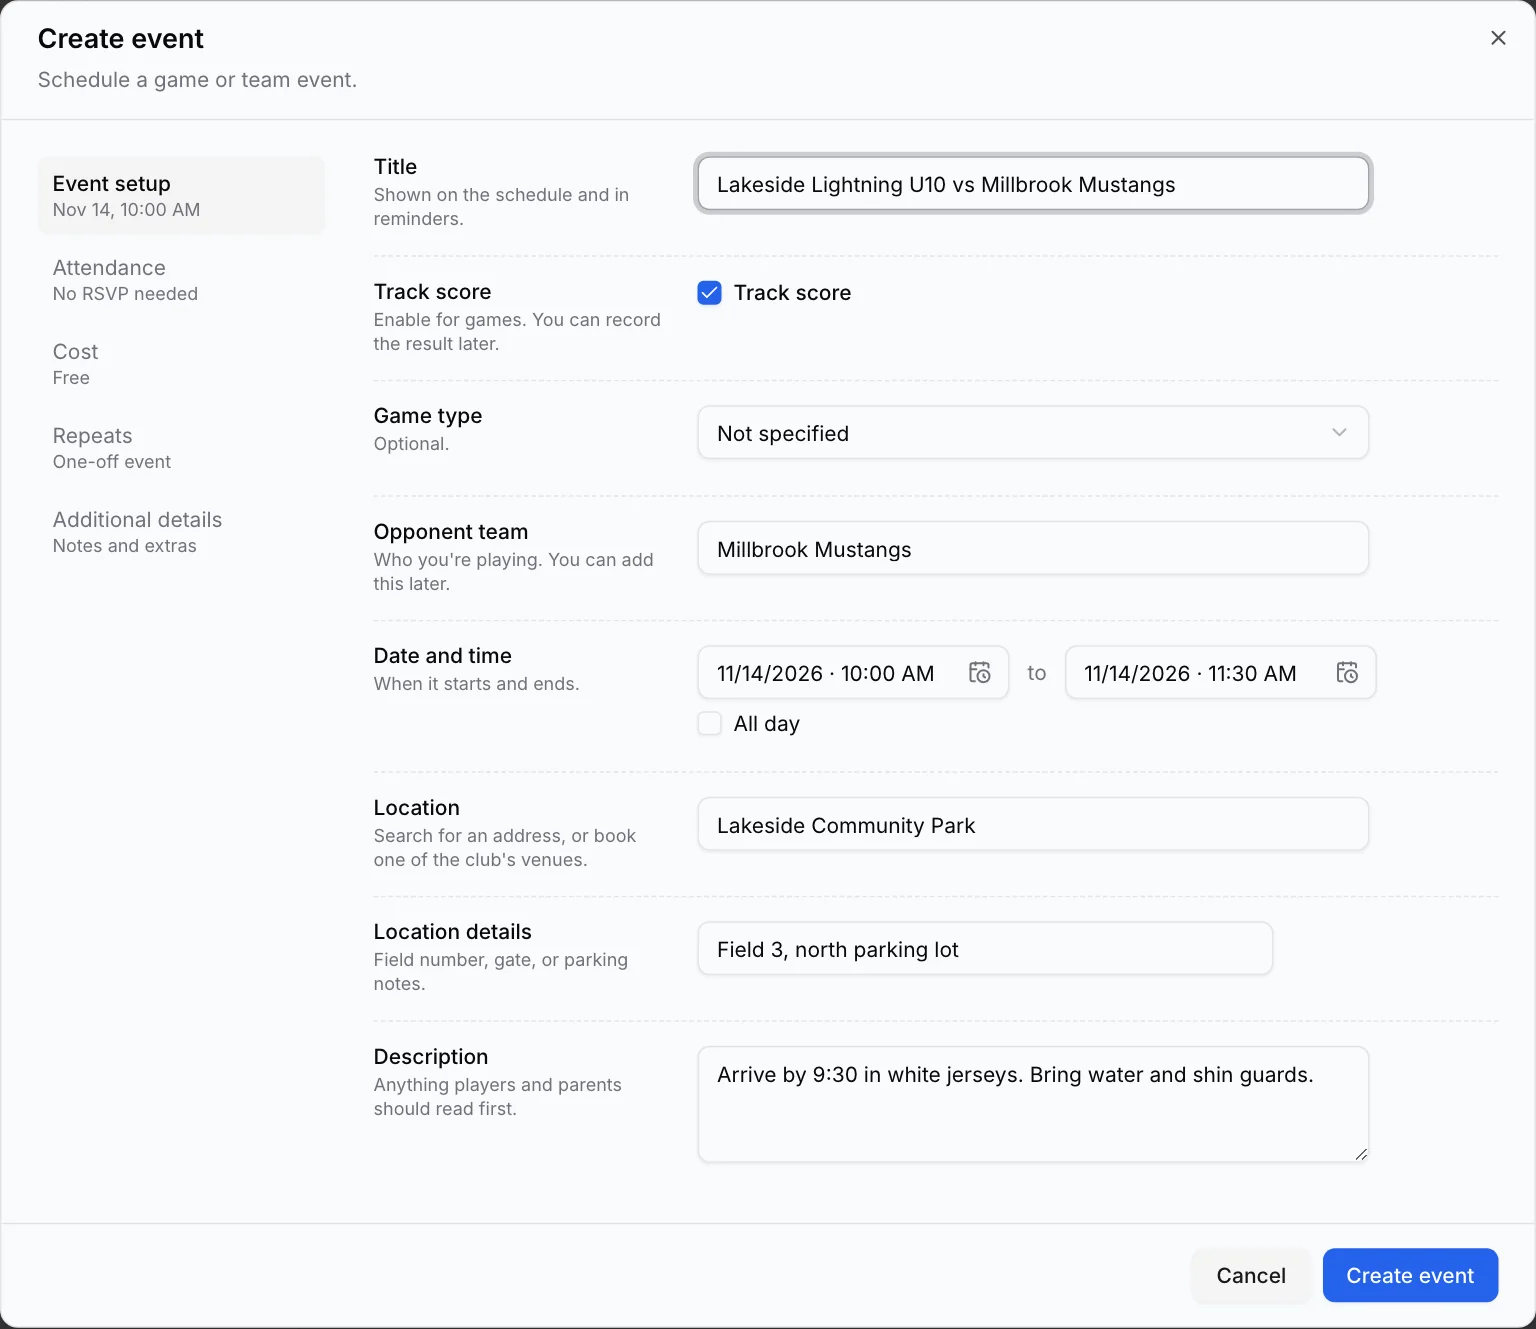
Use Location details for the field number or parking, and Description for what families should read first. To ask for answers, open Attendance in the form and select Collect RSVPs for this event. Then select Create event.
Our guide to practice schedules and RSVPs covers repeating practices, RSVP deadlines and attendance.
8. Send the first team update
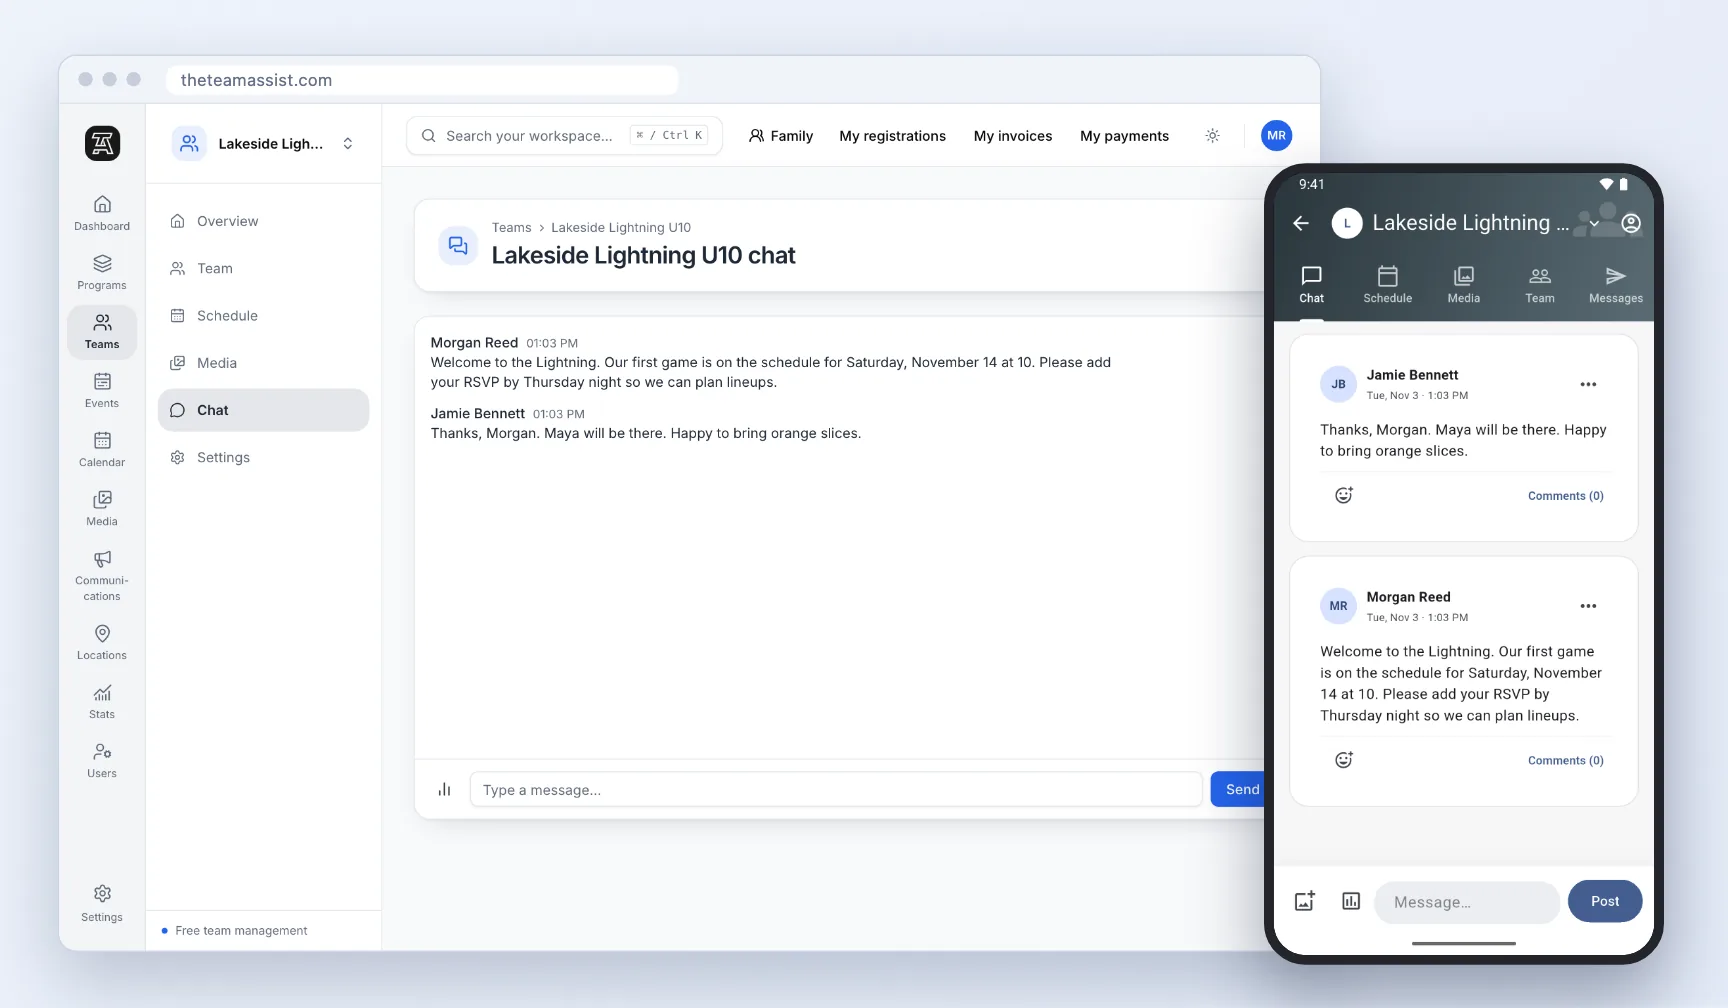
Open Chat, type your message and select Send. Point families to the new event and tell them when you need their answer. Starting here gives everyone one place to look, instead of another group text.
Families can read and reply on the web. The same conversation also appears in the Team Assist mobile app, which is coming soon.
Keep it moving
Check Connection requests often during the first week, because families can't see the team until you approve them. If a player's family hasn't joined by your first event, a direct message usually works better than another note to the whole team.
Then add your weekly jobs to the team manager checklist. You can see more of what teams do after setup on our team management page.